
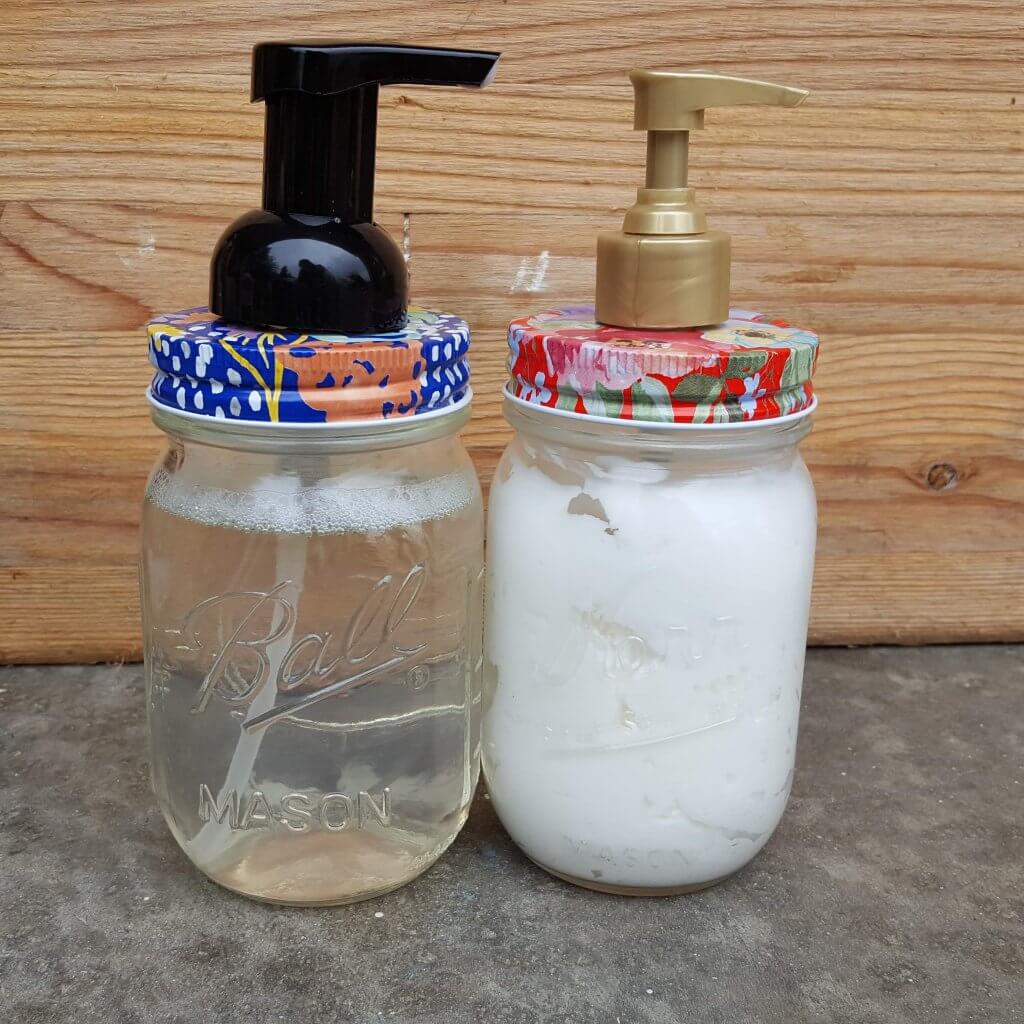
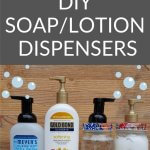
Learn how to make an easy mason jar soap dispenser. Soon you’ll be well on your way to enjoying cleaning your hands. Please note that these instructions will work for foam soap (as pictured), gel soap, dish soap, and lotion.
How to make an easy mason jar soap dispenser
Disclosure: As an Amazon Associate I earn from qualifying purchases. Please note that I only recommend products I use and love. Click here to read my full disclosure policy.
I love doing quick and simple DIY projects. This is one you can do quickly with a lovely result. I’ll go over all the materials needed and tell you how to make an easy mason jar soap dispenser in less than ten minutes.
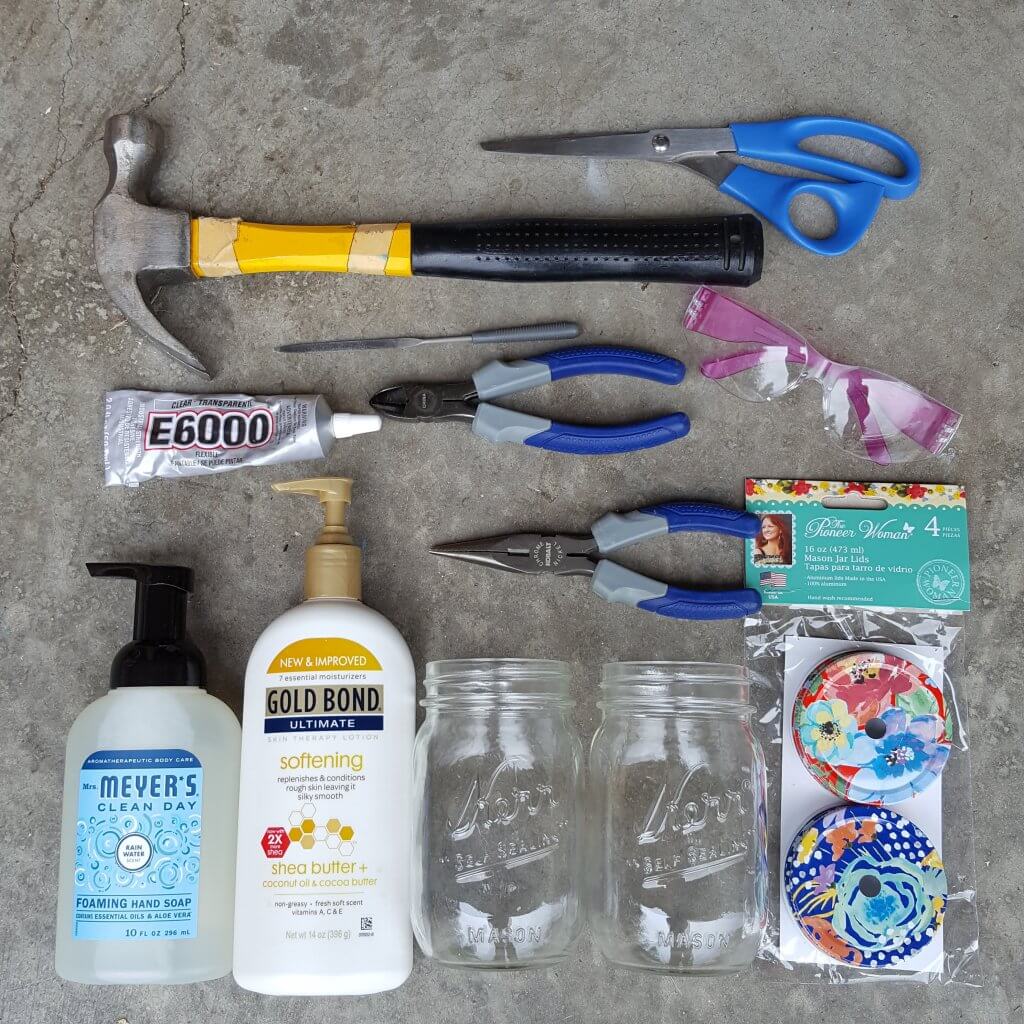
Materials needed:
- lotion or soap
- mason jar
- lids
- wire cutters
- goggles
- E 6000 glue
- hammer
- scissors
- metal file (optional)
- needle nose pliers (optional)
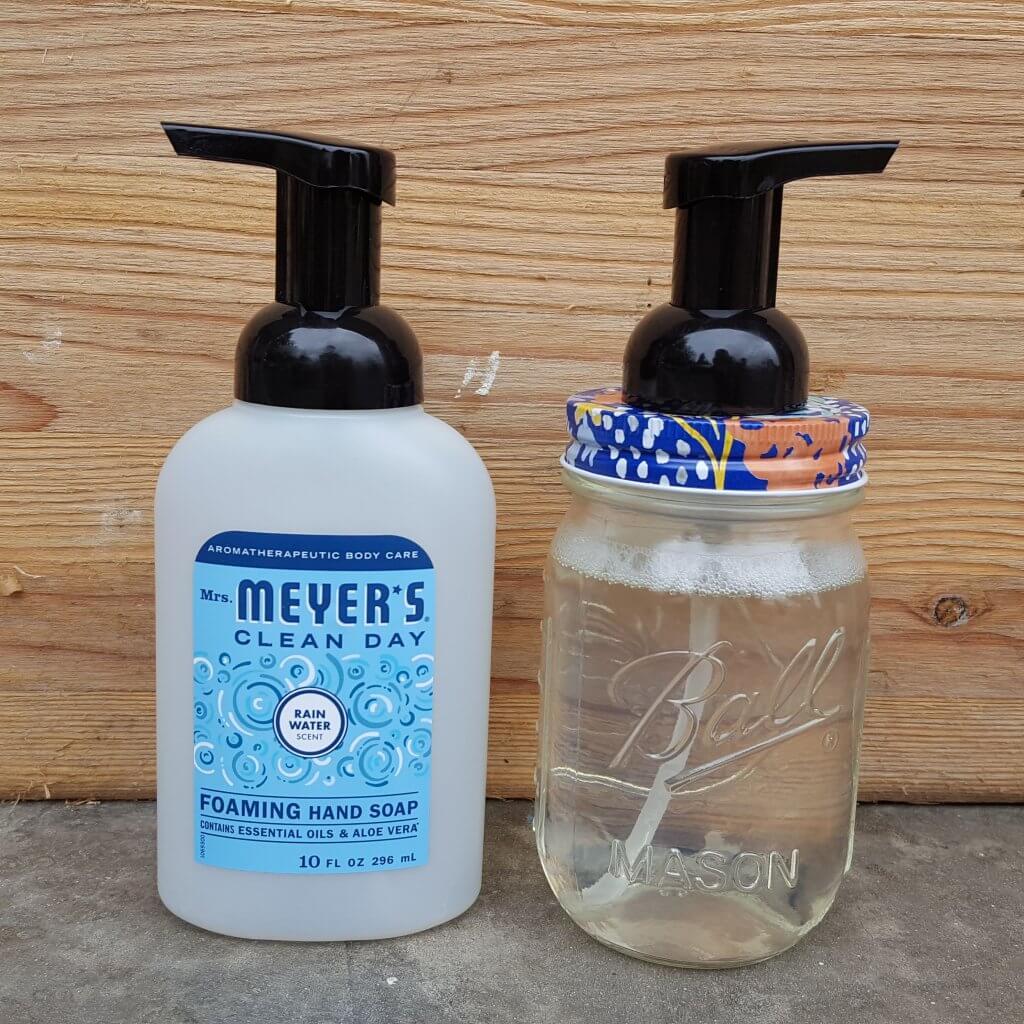
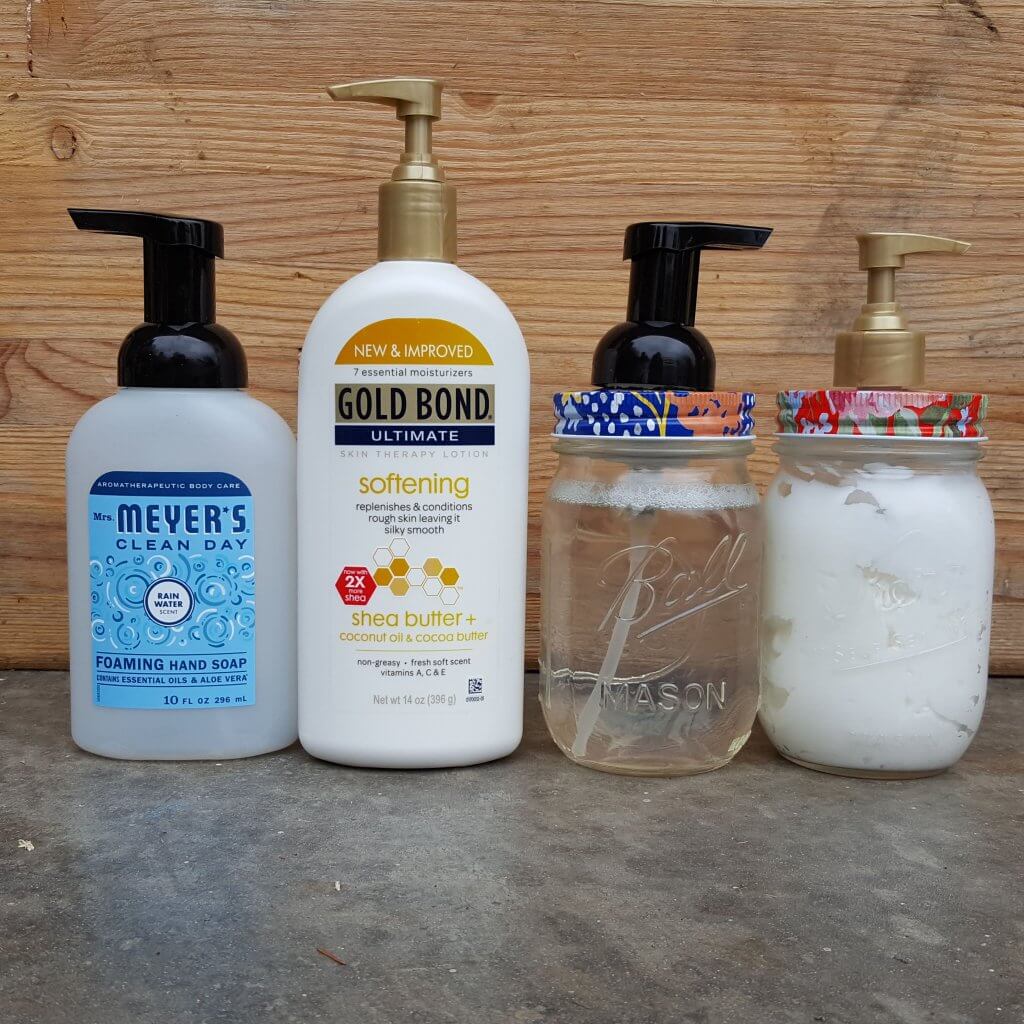
I already had the lotion, soap, mason jars, wire cutters, goggles, glue, file, and pliers on hand. The only thing I purchased was the lids. I found them at my local Wal-Mart store for about $4. The mason jars are pint size with a regular mouth opening.
Total cost of the project for me was $4 (with 2 lids left over). Your total amount will depend on the number of supplies and tools you have on hand.
Directions:
- Snip the correctly sized hole for your pump with wire cutters
- Smooth the edges
- Glue the pump to the lid
- Trim pump stem
- Fill the jar and put the lid on
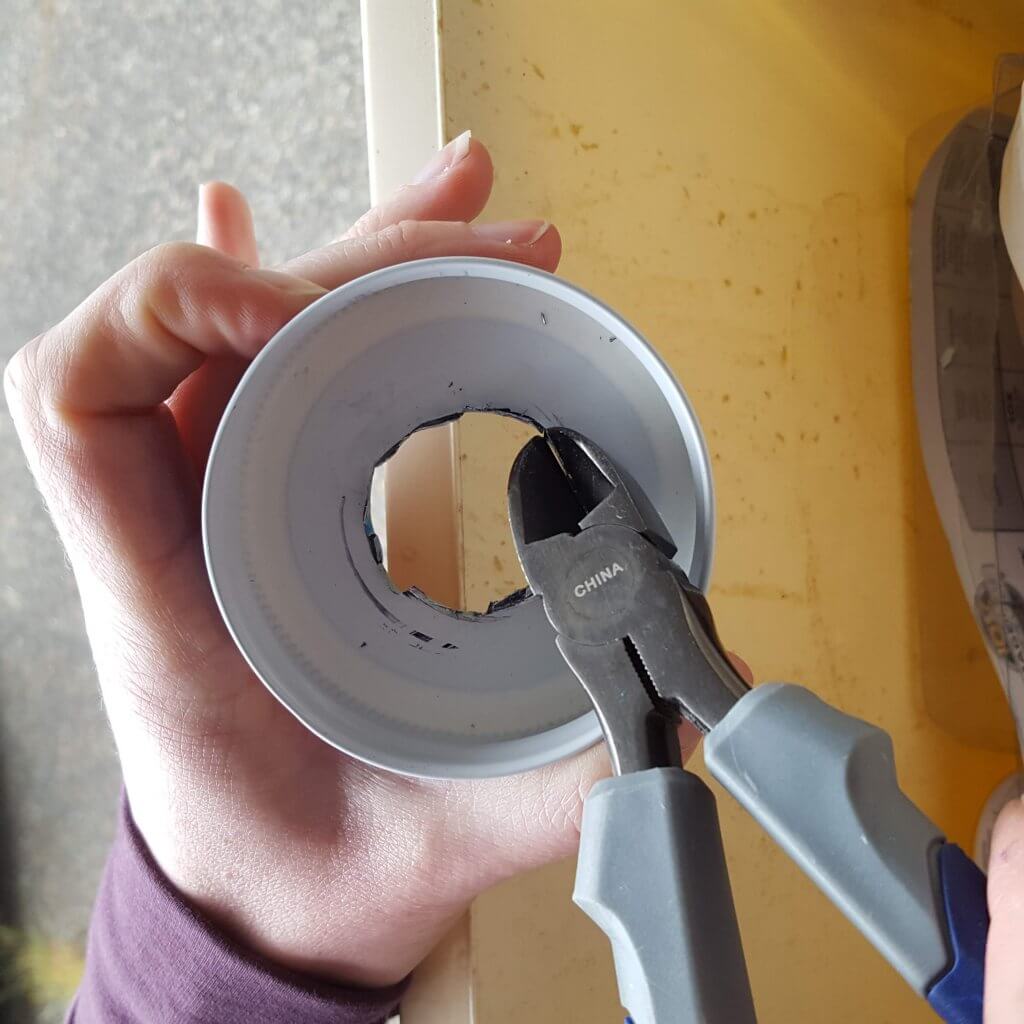
Cut the opening
Open the soap or lotion container and look at the size of the pump near the top. This is how large you will need to make the hole in your lid (about the same size as the opening of the bottle).
For the first one, I eyeballed the size and used a sharpie to mark the circle. For the second one, I skipped this step as it seemed unnecessary. With using this type of lid, you already know where the center is because there is already a small hole in it. You’ll be building out the hole to the size it needs to be for the pump you’re using.
I opted to cut a little at a time and then tried putting the pump through to see when I’d gotten to the right fit. You want it to fit tightly.
When cutting the metal, wear goggles and cut over a trash can outside. You don’t want to have tiny metal shards end up in your eye or your carpet.
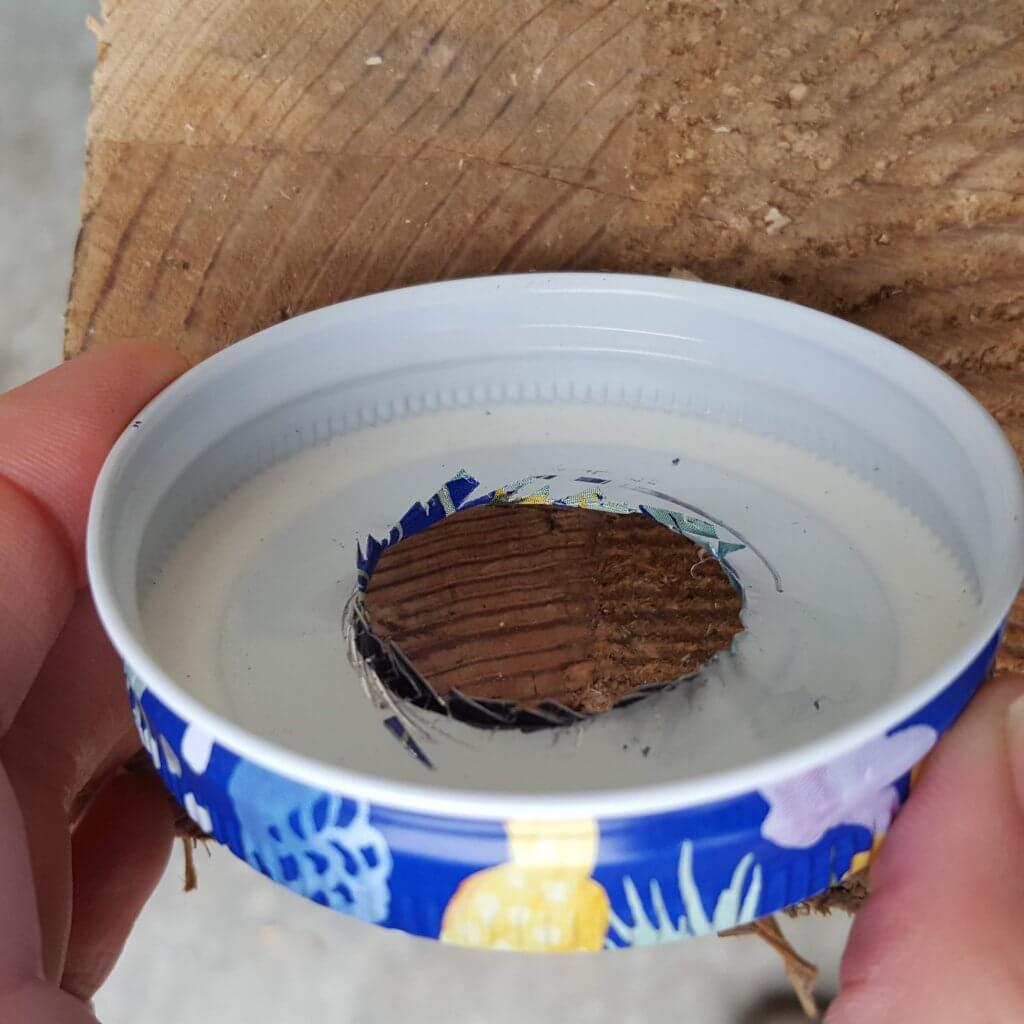
Smooth the edges
After the hole is the right size, smooth out the metal edge. I first hit it with a hammer a bit, trimmed any loose pieces, and used a metal file to soften the edges. The needle nose pliers were helpful if I had small pieces I needed to bend. You won’t need the edge perfectly smooth as you will be covering it with glue.
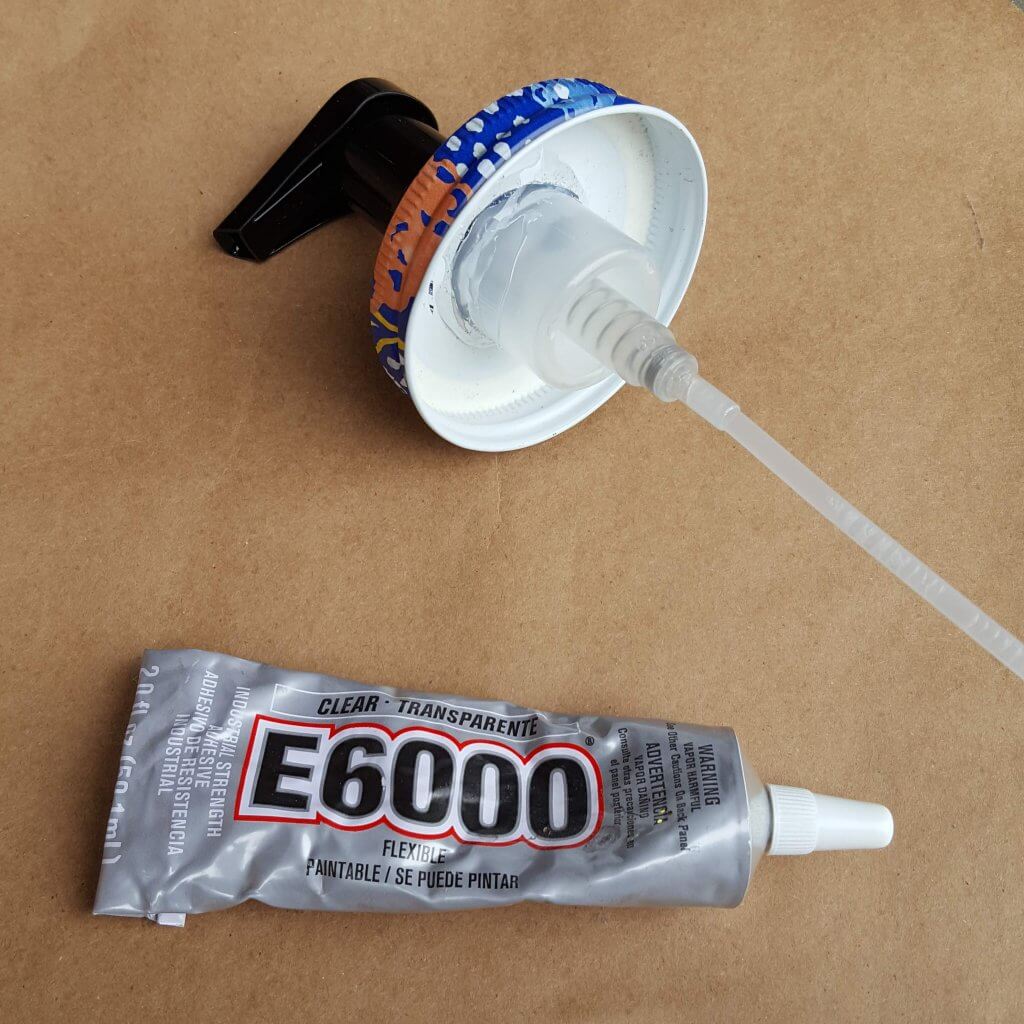
Glue the pump to the lid
Put the pump on and glue it. I used E 6000 glue. Allow 72 hours to dry. It’s best to use glue underneath as shown as well as under the edge of the lip on the top (to maximize sturdiness).
Trim pump stem
Depending on the size container you’re using this step may be unnecessary. Word to the wise, you want to trim the stem BEFORE you put the soap or lotion into the jar so you can make sure the length is right without putting it into the liquid. You’re welcome for making that mistake so you could avoid it.
Fill the jar
Fill the jar with whatever soap or lotion you want and screw on the lid and you are done. This would also work for dish soap if you wanted.
Frugal tip
We like using foam soap because our kids often use too much. When we refill the containers, we will use gel soap instead. Put 1 inch of gel soap in the bottom and then fill the container with water until it is 80% full. Then gently shake to mix. Now you have foam soap and you saved money. You smart shopper, you.
Congratulations. Now you know how to make an easy mason jar soap dispenser! You’ve also taken a step to declutter your home starting with your countertop with these lovely jars instead of the advertising labels on the products. Win, win!
Want to keep up to date on the latest Simplicity Habit information? Sign up below and also receive the 8 Quick Decluttering Wins checklist!
Or you could simply remove the labels, as the bottles the products come in are plain. It can be a bit of work to get them off if they won’t just peel off, but it can’t take longer than the method described above. Just a thought–it’s what I did.